So, before I begin let me first say that obtaining the ultimate bowl of ramen is impossible. I imagine that at one point somewhere way back when,when ingredients where at their peek and one could spend an infinite amount of time cooking you could possibly make the "ultimate" bowl of ramen. That being said prepare yourself, the following took ten hours. The broth alone took eight! It is a cooking marathon. By the end you will probably wish you had made gallons just so you don't have to make more. Lot so work here.
After watching someone making ramen in front of me, having an epic ramen tour of NYC with our lovely and patient Japanese friends and countless hours of internet research I decided to tackle making Tonkotsu (pronounced Tone - Cot - Sue) Ramen!
Tonkotsu Ramen is made with pork bone and chicken backs and has a cloudy, creamy broth with flat udon like noodles. More often than not it will have some pork fat and vegetables in there as well. Besides the broth it is often served with Mayu (a black garlic oil which we will cover in a future post). All other garnish is kind of personal preference. We will get to the meat and other garnishes in part two. This is part one in an epic three part ramen battle!
The broth.
It always pays to start with the best ingredients. Unfortunately with our recent move to Boone, North Carolina it is tough for us to get anything let alone specific asian market items. With a quick google maps search we were off Tennessee. Seriously we had to drive one state over to get most of the stuff we needed. We had to make some substitutions.
Here is my supply/ingredient list and recipe. It is basically a bunch of recipes smashed together. I tried to be as traditional as possible.
Large stock pot (preferably cast iron with a heavy lid)
Filtered water (at least three gallons)
Two large leeks
12 green onions
4 bulbs of good garlic (20-ish cloves peeled)
2 large yellow onions (paper on or off, if you leave the paper on wash them)
1 two to three inch knob of garlic
1/4 cup of good quality vegetable oil
6 or 7 large, bone in pork ribs (the bigger the bone the better)
4 large, skin on, chicken legs
WARNING this is the part in the recipe where I totally veer off course because of lack of access to proper ingredients (in my opinion it didn't ruin anything but a purist should just skip this part)
What you should use : Chicken backs and chicken skin, Pork shanks (just the bones) You would blanch both, roast the pork bones in your broiler, pick out the marrow and add them to your pot.
What I did: I could not find just the chicken backs and after driving to Tennessee to get the other stuff I really didn't feel like breaking down a whole chicken so I bought four high quality, skin on legs (organic, free range). I also could not locate pork shanks so I bought some really nice large pork ribs. They had some big bones. Again, not exactly what I should have used but in a pinch the best I could have done.
HERE WE GO
Step one: Start with filtered water, lots of filtered water. We have city water which is fine but it has a unique taste. So into the Brita with you! I think when it was all said and done I filled this thing five times! It is good to have plenty of water at the ready so you can pour it in the pot when you need it.
Step two: Prep your veg. Rough cut your leeks, and soak them in cold water. Let them sit for a bit. The longer you let them soak the more dirt or sand will sink to the bottom. While you have the cutting board out you might as well cut all of the bottoms off of your twelve green onions. We will just be using the bottoms. Keep the tops we will need them later (part three) I used a salad spinner to spin the leeks and the bottoms. Nice and clean.
Step three: Chop your onions into quarters (paper on or paper off), peel your garlic and rough cut your ginger (1/8" rough slices). Get out your large cast iron crock pot, add your vegetable oil and brown your garlic, onions and ginger. You want some deep brown parts here but don't let it burn . This will dramatically enhance the flavor of the broth.
Step four: Blanch your meat. The meat should be gray-ish in color. You should be able to multitask and both brown your veg and blanch your meat.
Step five: Once the meat is ready drain it. Transfer the meat to the veggie pot. Add filtered water (3/4" from the top) Add your leeks and your green onion bottoms. Crank up the heat! You want a steady boil not a rolling boil. The broth is going to boil down over an eight hour period. You will have to add filtered water over and over again during cooking.
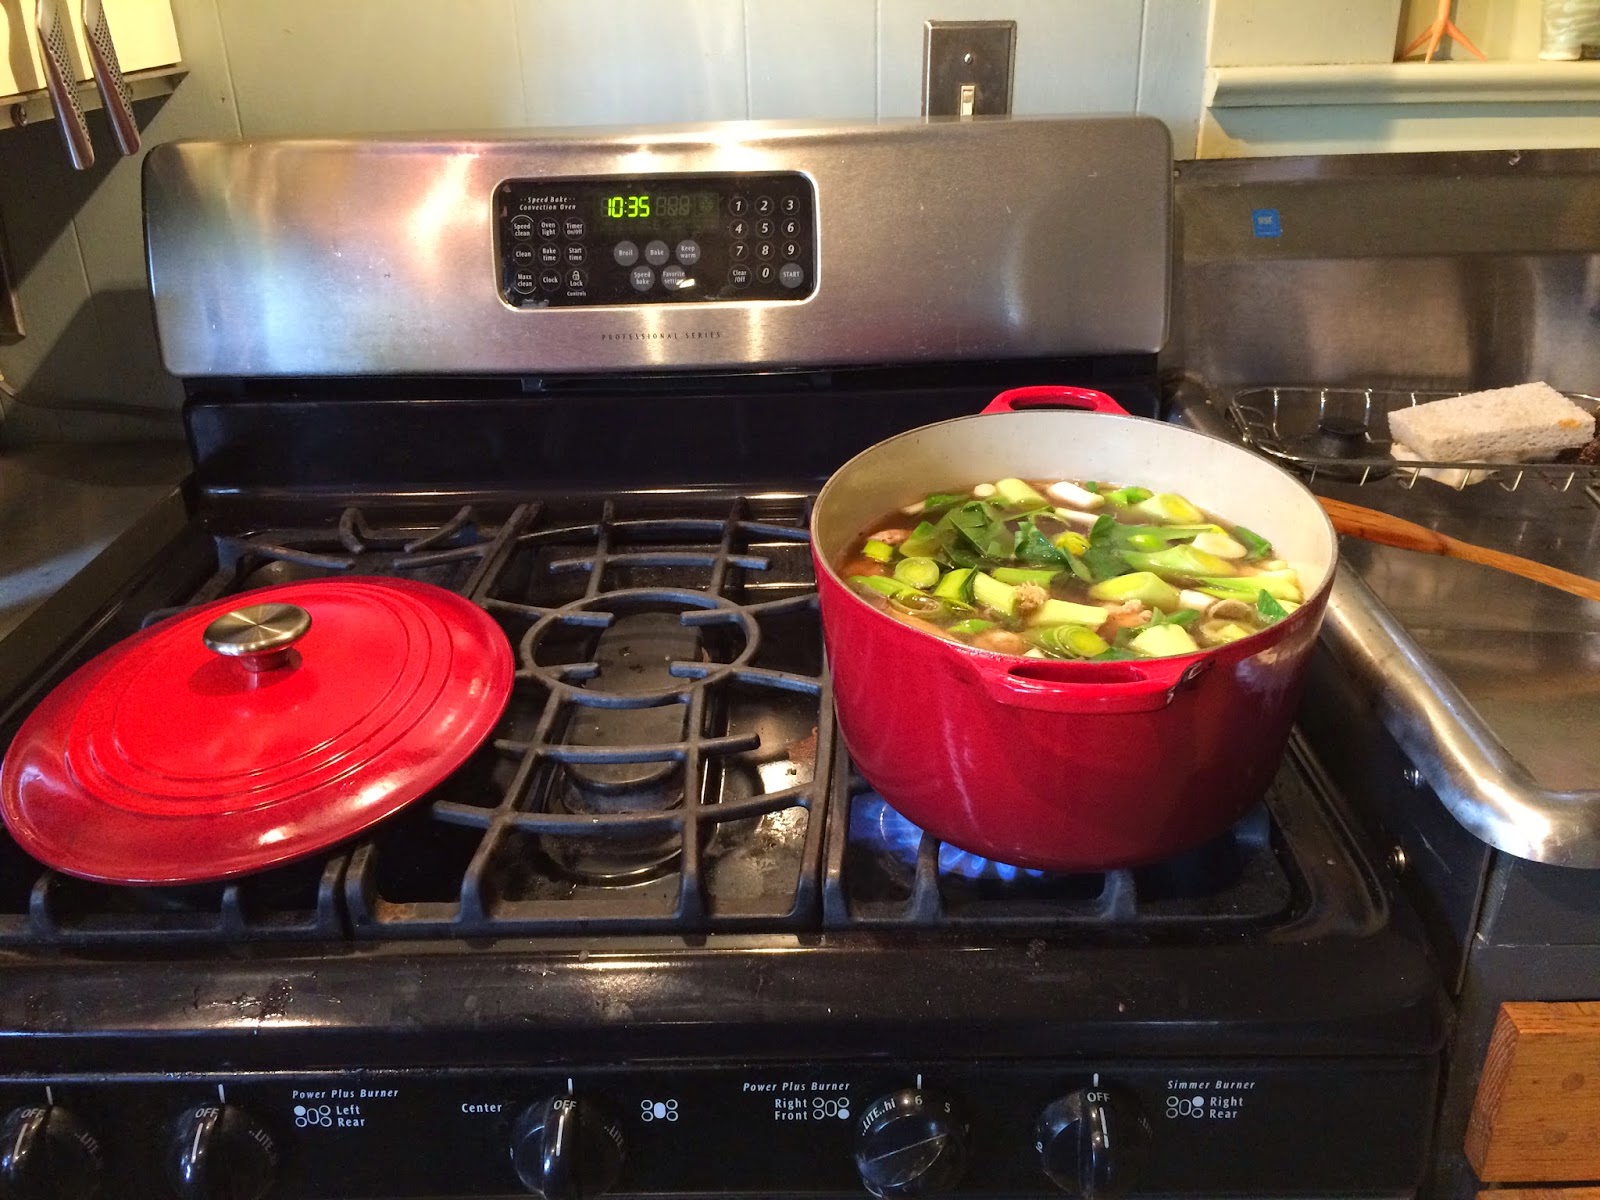
Step six: As the water boils, you will notice the level going down and the veggies will start to break down. The images below are in all the steps. The first image is at the beginning, the second is about an hour or so later and so on. This is where you you have to decide what kind of soup you want. If you want a clear broth (Shōyu or Shio ramen) you want it low and slow. If you want a cloudy broth you want it boiling all the time. The Tonkotsu Ramen by definition has a cloudy broth. It is cloudy because of the fat from the chicken and if you are a purist pork fat.
.
Step seven: After about four hours it is time for "soup maintenance". Most of your veggies at this point will have turned to mush. This is the time to add your flavor enhancers. These are the items you want to boil the flavor out of and remove before they turn to mush. I added some dried kelp or Kombu (pronounced Come-Boo). This is different than the dried seaweed snack which is super thin. Kombu is thick and once re-hydrated is a thick slimy sheet. It is FULL of flavor. You only need one sheet/piece. We also added some dried shitake mushrooms. We re-hydrated the mushrooms in a bowl of filtered water, then added them to the pot.

Step eight: Let the pot boil for another two hours. Keep adding water to try and keep the soup level around 3/4" from the top of the pot. The broth, at this point should be cloudy, brown and full of awesome goodness. Looking at the clock we are around the six hour mark here. It is time to remove some stuff. If you cook the bones and meat for too long it gets strange. So using a sieve remove all of the large debris. This would be the pork bones from the ribs, the chicken bones, cartilidge, the kombu, the mushrooms. etc. You don't have to get all of it out. Try to skim the top of the pot. Get all of the foamy weird stuff off.


Step nine: There is some good stuff here. I separated the chicken and the rib meat to save for later. I left in the mushrooms at this point. I think the mushrooms add to the flavor but it again it is personal preference. We are hovering around the eight hour mark at this point. It is now time to filter the broth. This is a two person job. The pot is heavy, hot and full. A nice sieve that has pot hooks to rest on top of the pot helps a lot. I started with a ladle and made a mess. After cooking this for so long you do not want to miss the pot and spill this all over the place.
Step ten: Put all of the filtered broth back in the stock pot. Turn down your heat. You can stop boiling it now. The broth should be super hot but not boiling. A film might collect on the top and make a skin of sorts. You can leave this till you are ready to serve. Skim it off before you plate it though.
A few things here. This broth is amazing and full of flavor but has almost not salt. For some reason I wanted it to be salty. Resist the urge to add salt. When you plate your ramen you should first add a high quality soy sauce to the bowl before adding your broth. This will provide the salt. Also when we get to part two and three you can add all kinds of stuff to boost. The broth has a purity to it that you should try to retain.
On to step two.......


